We are super excited to announce that vElements.net has been selected among the top 25 Virtualization blogs by Feedspot. During the past three years, we have been working hard to publish technical articles to assist the community.
This selection at Feedspot is based on the following criteria:
Google reputation and Google search ranking
Influence and popularity on Facebook, Twitter and other social media sites
Quality and consistency of posts
Feedspot’s editorial team and expert review
We really appreciate the support we get from the community and it gives us the energy to continue this journey!
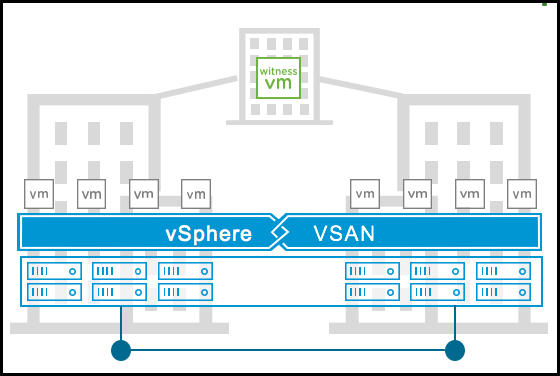
vSAN Stretched cluster introduced in vSAN 6.1 and it brings high availability in an active-active fashion. In this architecture, ESXi hosts would be placed in two different physical locations and join together with high bandwidth low latency networking. But from a management perspective despite hosts being in two different sites they belong to one single vSAN Cluster and share their resources. So this solution can be used in environments where disaster avoidance is a critical matter. Because it gives you the ability to avoid disaster, or recover from a disaster by having two different physical sites that host your applications. So you need to group the hosts based on their physical locations and put them in two different fault domains.
After a long wait, VMware finally announced NSX-T 3.2 on November 7th, 2021! There was a lot of buzz around this release for the past 2-3 months. In this article, we will look at the new features of this release. The new capabilities are grouped into three major areas; Security, Advanced Networking, and Simplified Operations, which I will list as the most significant enhancements in this article.
When we look at the new features and capabilities list, security enhancements are very bold. So let’s start with the security features and continue with networking and operations enhancements.
A few days ago we faced an issue with login into vCenter Appliance Management Interface or VAMI with “Unable to authenticate user” error. It was really strange since we were quite sure the password for the root user was correct. File-based backup needed to be configured on the vCenter Server and as you know this configuration can be applied through the VAMI interface. To make sure the password to the root user has not been changed, we tried to connect to the vCenter Server through SSH, and as expected the password was correct! Strange isn’t it?!
In this article, I will explain how you can solve this issue on the vCenter Server Management interface.
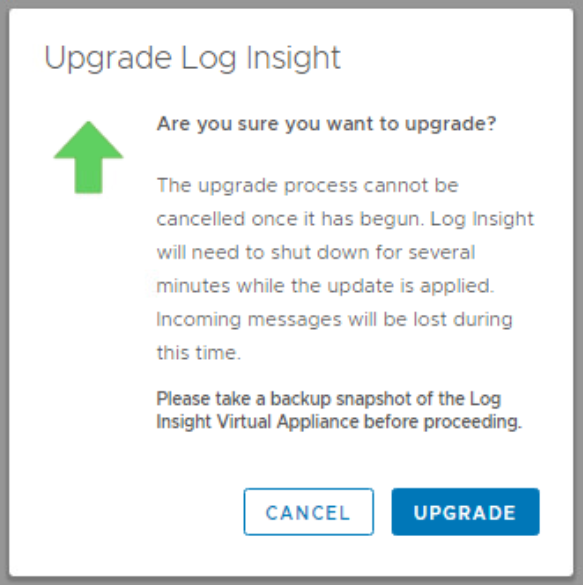
Upgrading vRealize Log Insight is a pretty straightforward process. You need to download the upgrade PAK file from VMware website. Then under the Administration section of the vRLI dashboard, under Management click on Cluster, and on the right panel, select Upgrade Cluster. You might have a standard non-cluster vRLI environment but doesn’t matter the upgrade process goes the same path both for standard and cluster environments. Then you just feed the wizard with the downloaded PAK file and then start the upgrade process. Super easy huh?!
It should go that easy, but as you know, when working in the field things always don’t go as planned!
VMware vSAN is Software-Defined Storage(SDS) solution from VMware that is fully integrated into vSphere. To enable vSAN, we need to have a minimum of three ESXi hosts, and each host needs at least one cache disk and one capacity disk. The local disks of ESXi hosts should be formatted by VMFS. Since vSAN is a vSphere clustering feature, we should also have Center Server in place before start implementing it.
If you are a System Administrator or even a Solutions Architect, you might a face a challenge to build a vSAN Cluster with minimum ESXi servers without having a vCenter in place. In many green field environments, vCenter has not been installed and you want to keep ESXi’s disks intact and unformatted. In addition, there are some customers that want to build and manage vSAN Cluster in a separate vCenter and they do not have any additional ESXi host for vCenter deployment.
If you are using vRealize Suite’s solutions like vRealize Operation, vRealize Automation, or vRealize Log Insight, then vRealize Suite Lifecycle Manager(vRSLCM) comes in handy into day to day operations. This product automates the deployment, configuration, and upgrade of the vRealize Suite. If you plan to deploy any of vRealize products or even automate the Day 2 operations like certificate replacement, then vRSLCM is a go-to tool for your use case. It is also worth mentioning that some products like vRelaize Automation(vRA) use this solution as a built-in tool for the deployment process. It is recommended to deploy vRSLCM first and then deploy and other vRealize Suite products due to ease of installation and configuration orchestration. But if you already deployed any of the suite’s products, you can also add them into vRealize Suite Lifecycle Manager.
In this blog post and following video tutorial, I show you how to deploy vRealize Suite Lifecycle Manager with Easy Installer and lay the foundation for the rest of vRealize Suite products deployment. The license for this product is included in any edition of the vRealize Suite licensing package.
In the first part of NSX-T Distributed Firewall, I explained the importance of embracing NSX-T DFW. In this post, I review how you can create and apply firewall rules to implement Micro-segmentation. To create firewall rules, first you need to define a Policy section which basically contains one or more firewall rules. A policy in NSX-T DFW can be defined as stateful or stateless. In the case of being stateless, you need to define the rules in both directions. Otherwise, the reverse traffic is not allowed to pass. On the other hand, in the default stateful mode, when you define a rule it will apply bidirectionally.
Then you need to define the rules under the policy section which evaluates the criteria of a traffic flow. DFW rules determine whether the traffic should pass or get dropped based on the protocol and ports.
Earlier this month, VMware released a new version of HCX, the powerful multi-cloud migration solution. With the help of HCX, you can easily migrate your virtual workloads between private clouds and, more importantly, to public cloud environments like Azure VMware Solution(AVS). Additionally, when HCX is being used in conjunction with public cloud SDDCs like AVS, cloud migrations would be as easy as running a vMotion internally inside your data center. Sounds great, isn’t it!
It is also important to note that many enterprises are using only site-to-site VPN as the connectivity method for on-prem to public cloud infrastructure. Because of this, formal support of HCX over VPN underlay has been asked by many organizations and customers.
NSX-T Distributed Firewall (DFW) is one of the most comprehensive solutions to provide micro-segmentation from layer 4 to layer 7. It can monitor all the East-West traffic on your virtual machines and build a Zero-trust model. To leverage the DFW, vNIC of virtual machines need to connect to NSX-overlay segment, NSX VLAN backed segments or vDS port group supported from vSphere 7.0. The benefit of using DFW is that firewall rules apply at the vNIC level of virtual machines. In this way, traffic does not need to traverse to a physical firewall to get identified if the traffic can pass or drop, which is more efficient. This article will focus on using DFW to enforce L7 (FQDN/URLs) filtering.
You can give internet access to a VM or a user who login to a VM by Identity Based Firewall or even take one step further and control which specific URL/URLs are allowed to get accessed.