In the previous blog post, we discussed the installation and initial configuration of Microsoft Certificate Service on a Windows Server and enabled Certificate Web Enrollment on that server. The second step to replacing the default self-signed certificate in VCF is to prepare the Certificate Authority with a new certificate template and assign a service account so that an alternative user can request the certificates instead of the default administrative accounts. With that said, let’s move forward with creating the customized certificate template.

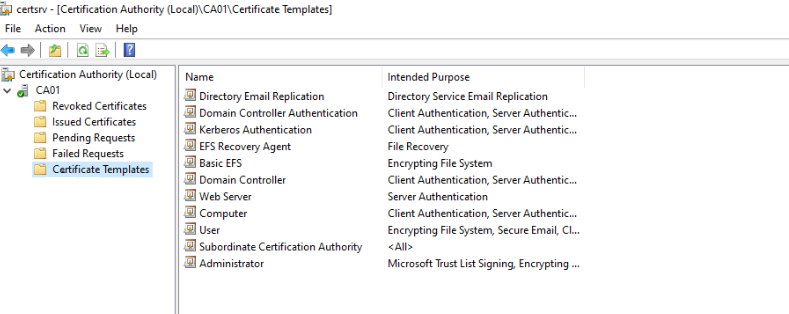
When you request a certificate from a Certificate Authority(CA), the CA lets you choose from its templates store. We must create a template and publish it in the certificate store to create a customized certificate. Open the Certificate Authority snap-in from the CA server’s Administrative Tools to create the customized certificate. If you click Certificate Templates under your CA, you’ll see all the valid certificates in the certificate store.
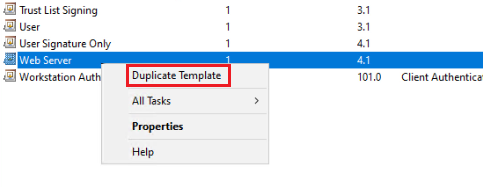
Right-click on Certificate Template and choose Manage to open the Certificate Template console. Because the template we create will be used for SSL and secure web traffic, the Web Server template is closest to our needs. So right-click on Web Server and choose the Duplicate Template option.
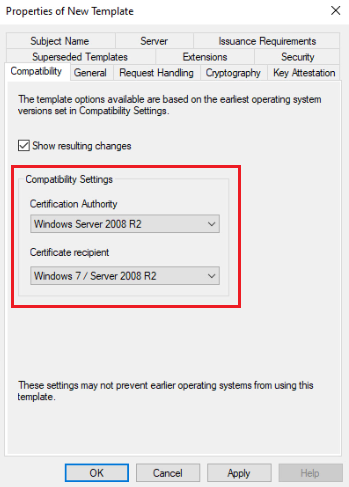
To customize the template, in the Properties of New Template dialog box, follow these steps:
- Compatibility Tab:
- Set Certification Authority to Windows Server 2008 R2.
- Set Certificate recipient to Windows 7 / Server 2008 R2.
2. In the General Tab:
– Enter a name (for example, “VCF-SSL”) in the Template display name field.
3. In the Extensions Tab:
– Click Application Policies and then select Edit.
– Under Server Authentication, click it, then click Remove and confirm with OK.
– Next, click Basic Constraints and select Edit. Check Enable this extension and click OK.
– Click Key Usage and select Edit. Check Signature is proof of origin (nonrepudiation) is selected.
4. Subject Name Tab:
– Confirm that the Supply in the request option is selected, and then click OK to save the template.
After creating the new template, now go back to the Certificate Authority console, right-click on the Certificate Template folder, and under New, choose Certificate Template to Issue. Now, choose and add the new certificate template to the certificate template store.

After completing all the above steps, we have prepared and published the certificate template. We also have the option to create a Service Account, assign permissions to it, and use the Service Account to integrate Microsoft CA with SDDC Manager. For this purpose, create a user account in Active Directory and prepare that account for service usage purposes. In this environment, we have a service account called svc-sddc-ca@velements.net that will be used to replace certificates and integrate CA.
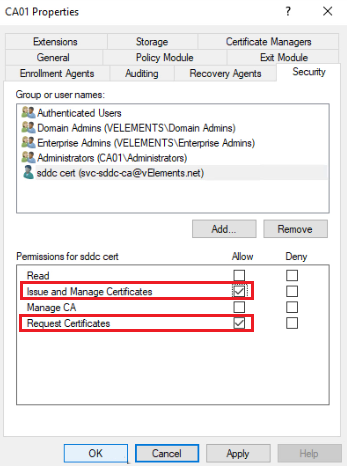
To assign permission to the service account, first open the Certificate Authority console, right-click on the CA, and choose properties. On the Security Tab, click on Add, find the service account you have in place, and then assign Issue and Manage Certificates and Request Certificates to the user.
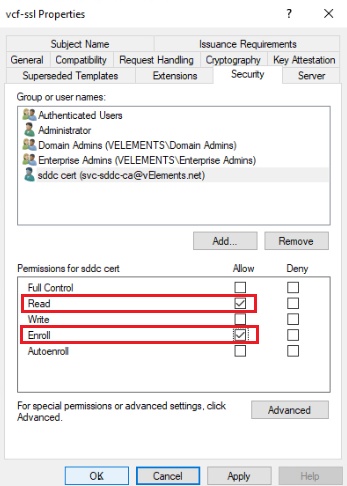
Next, we need to assign permission to the certificate template we created earlier. To do this, open the Certificate Template console, right-click on the certificate template, and choose Properties. On the Security Tab, click Add, find the service account you have in place, and then assign Read and Enroll to the user.
Now that we have Micorosft Certificate Authority installed, configured, and prepared the Certificate Template and Service Account permission, we can move to the final stage, integrate Microsoft CA with SDDC Manager, and request the certificates for VCF components.