One standard method of issuing valid certificates to infrastructure software solutions like VMware Cloud Foundation(VCF) is through an internal Microsoft Certificate Authority(CA). Most organizations that use Active Directory(AD) as a directory service also use AD Certificate Services to issue certificates when replacing the self-signed, auto-generated certificates. Even though this service might be installed and running in your infrastructure, this blog post explains how to install and configure it on a Windows Server machine to integrate with VCF infrastructure. After installing and configuring Certificate Authority, we should create a Certificates Template, integrate VCF with this CA, and finally request certificates and replace them through SDDC Manager,
In this post, we will install AD CS on a Windows Server 2022 joined to an Active Directory domain and configure Web Enrollment to allow users to request and retrieve certificates via a web interface.
First, let’s go through the prerequisites for the Certificate Authority:
- A Windows Server 2022 is installed and joined to an Active Directory domain.
- An Active Directory account with administrative privileges.
- The server has a static IP address.
Install Active Directory Certificate Services (AD CS)
First, we need to install the ADCS role on the Windows Server through the Server Manager wizard. It is a straightforward process, but you need to make sure to select Certification Authority Web Enrollment role and also Basic Windows Authentication under IIS configuration. But let’s go through it step-by-step:
- Open Server Manager and click Manage → Add Roles and Features.
- In the Add Roles and Features Wizard, click Next.
- Choose Role-based or feature-based installation and click Next.
- Select the server where AD CS will be installed and click Next.
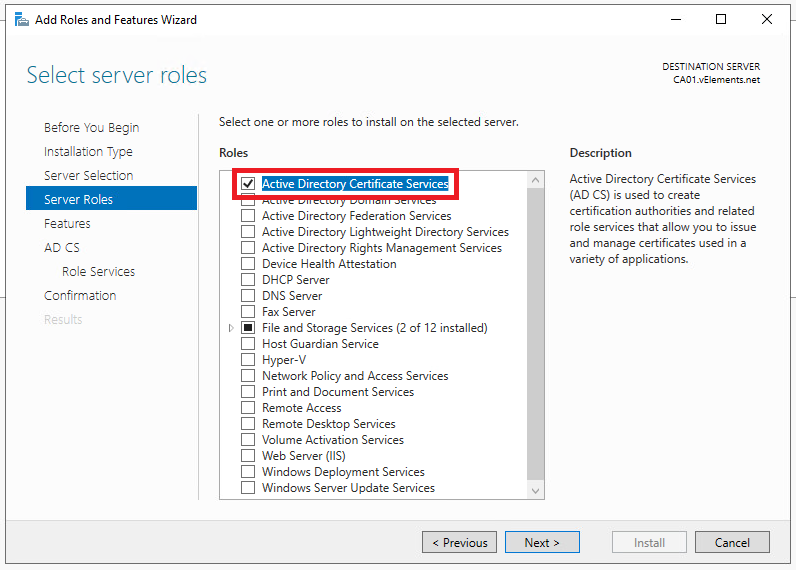
- Under Server Roles, select Active Directory Certificate Services and click Next.
6. In the Features section, leave the default selections and click Next.
7. Under Role Services, make sure to select Certification Authority Web Enrollment besides the default selection of Certification Authority
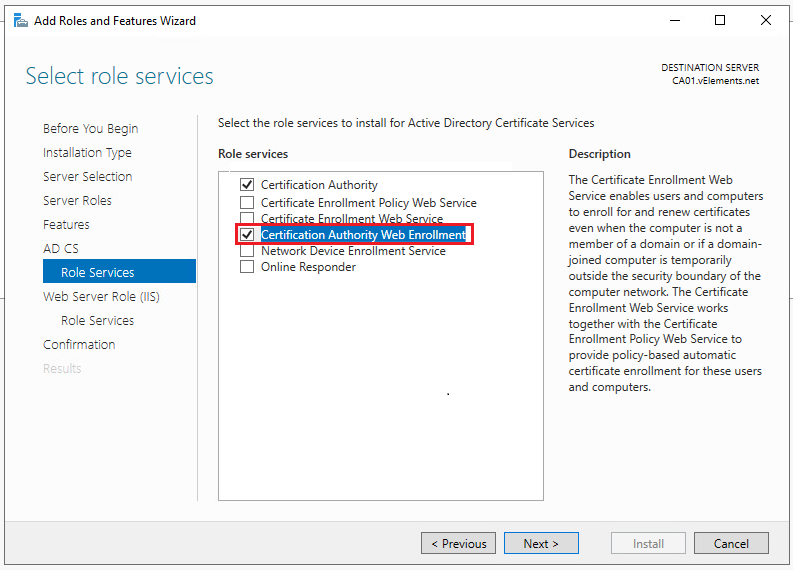
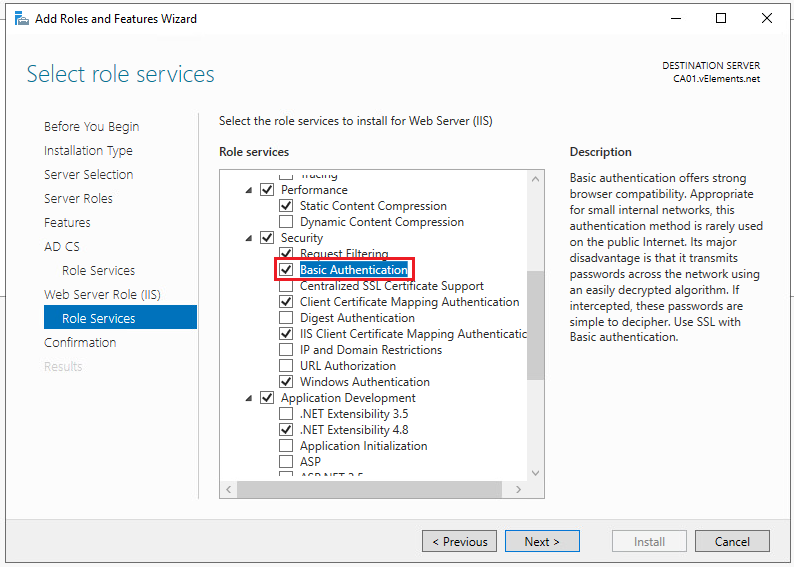
When you select Certificate Enrollment Web Services, a Web Server Role (IIS) will be added to the installation. It is important to select the Basic Authentication feature under the Security section.
Now click Next and start the installation. Wait for the installation to complete, then click Close.
Configure AD Certificate Services
When the role is installed on the Windows Server, we need to follow the steps below to continue configuring the Certificate Service role.
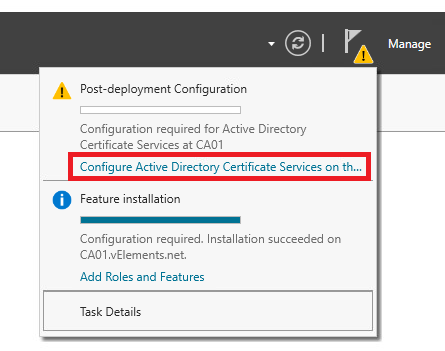
- On the Server Manager, click the yellow warning flag and select Configure Active Directory Certificate Services on the destination server.
- Select the current server and click Next.
- On the Credentials page, confirm that the displayed account has the necessary administrative permissions, then click Next.
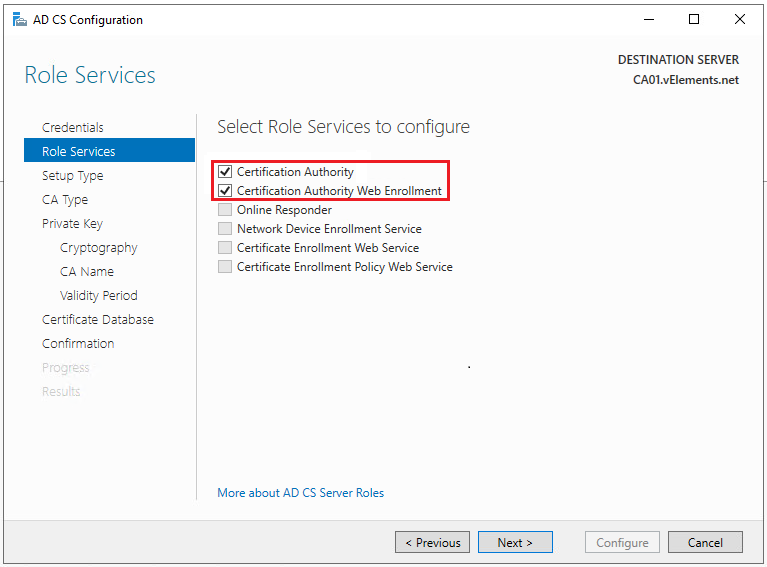
- Under Role Services, at this stage only select Certification Authority and Certification Authority Web Enrollment roles.
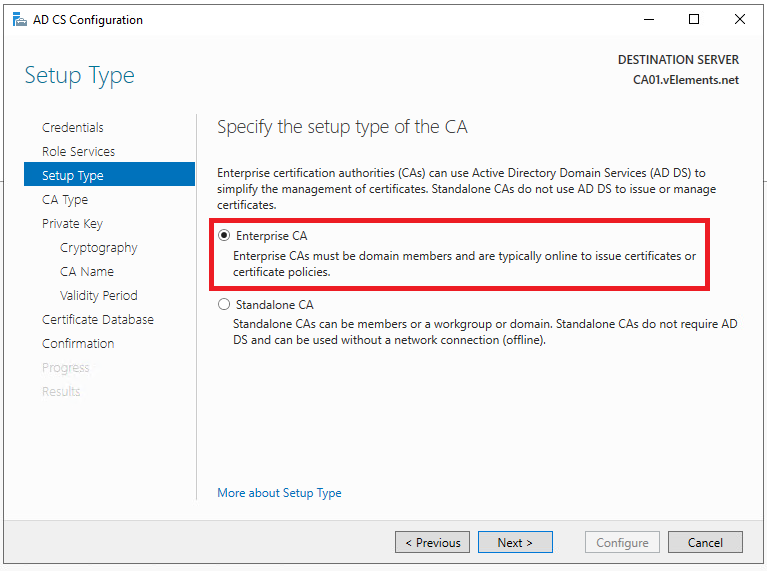
4. Choose Enterprise CA on the setup type page so the certificates and configurations will be part of the Active Directory.
5. In the Type of CA page, choose Root CA is it is the first certificate authority you are installing. Select Subordinate CA if you are building a hierarchy of CA servers.
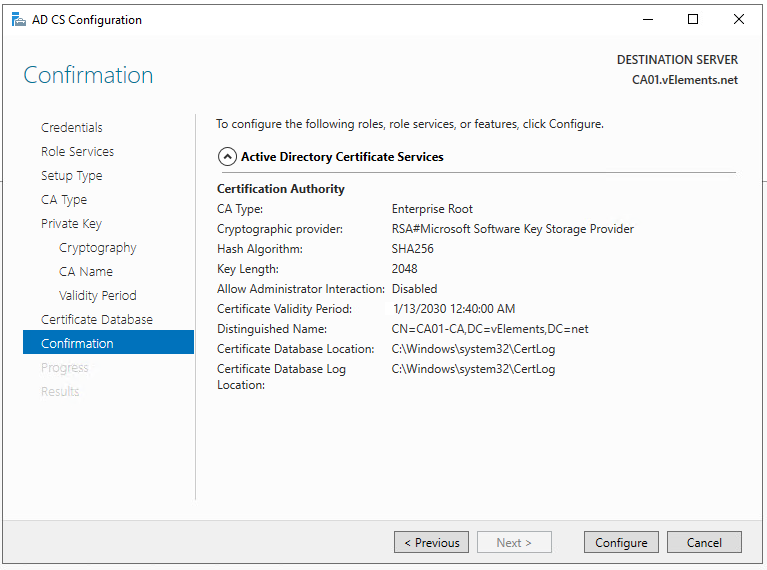
6. For the rest of the configurations, choose the key length, hash algorithm, and validity period of certificates based on your requirements. Here, you can see a summary of what has been selected for this Certificate Authority.
7. Finally, click Configure and wait for the Certification Authority role to be configured. Select Close when you see the Configuration Succeeded result.
Configure Basic Authentication in IIS
After installing and configuring the Certificate Authority, it’s time to verify IIS installation and configure Basic Authentication on the Web Enrolment website. It is important that we ensure that the Web Enrollment role is installed on the same machine as the Certificate Authority role. SDDC Manager can’t request and sign certificates automatically if the two roles (Certificate Authority and Web Enrollment roles) are installed on different machines. Basic Authentication should also be enabled for the automatic certificate request by the SDDC Manager.
First, open the IIS console from administrative tools in Windows Server or by running inetmgr in the Windows Run menu.
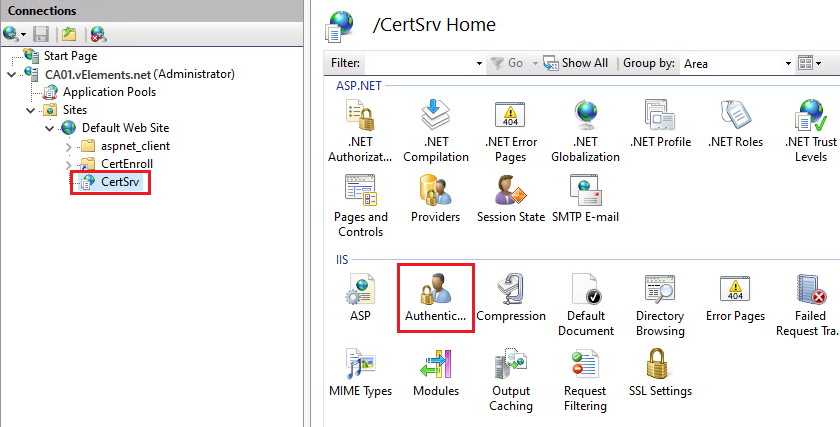
- In the IIS Manager and navigate to your_server.
- Expand Sites and select Default Web Site. Locate and select CertSrv.
- Under IIS, double-click Authentication.
- On the Authentication page, right-click Basic Authentication and choose Enable.
Then follow the below steps, to restart the IIS service so that the changes will take effect;
- In the left navigation pane, select Default Web Site again.
- In the Actions pane, under Manage Website, click Restart to apply the changes.
Now that we have installed Certificate Authority and configured IIS for the Web Eronlment, we can continue configuring the required Certificate Template to be used by VCF and its components. The second blog post in this series explains how to prepare a Certificate template for VMware Cloud Foundation components.